How To Add a Table to your Posts
Note: The Table function has changed since vBulletin 3 (affects posts made before Nov. 2017).
Sometimes, it is useful to be able to put data in a table within your posts. This allows information to be sorted better and be more organized.
When you start a new post or reply to an existing one, you are using the standard editor. In order to add or edit a table, you need to switch to the advanced editor. to do this, click on the "Go Advanced" button, on the bottom right of the editor:
You will then see the following icons on the toolbar, that can be used for creating and changing a table:
Insert Table Use this to create the table. Table Properties Change the settings for the table Delete Table Remove the table (careful) Insert Row Before Insert a row above the current row Insert Row After Insert a row below the current row Delete Rows Remove one of more rows from the table Insert Column Before Insert a column to the left of the current column Insert Column After Insert a column to the right of the current column Delete Columns Remove one or more columns from the table
How to create a table
A table consist of a grid of rows and columns.
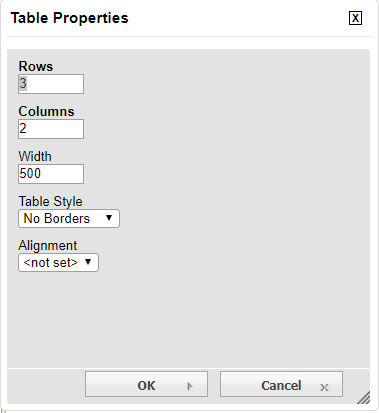
Click on the "Table" icon and a menu will appear:
Set the desired number of rows and columns, leave the width at 500 and then decide which Table style you want:
No Borders The table frame is not visible in your posts, the text is aligned.
Outer Border A frame appears on the outer edges of your table.
Full Grid A frame appears around each cell of the table.
Now decide on the alignment of the text in the table:
<Not set> The default setting is for the table to appear horizontally on
the left of the page
Left The table appears horizontally on the left of the page
Center The table appears horizontally in the center of the page
Right The table appears horizontally on the right of the page


 Reply With Quote